How can I use the interface I built to play melodies that I create?
Think About
- How can I make sound with a microcontroller?
- How can I program melodies in the Arduino IDE?
- What do I want my instrument to do?
Get Started
Step 1. Watch the following video that shows you how to understand the Arduino IDE. Directions are available below in text:
- Let’s learn a little more about the Arduino Sketches. There are three main parts of an Arduino Sketch
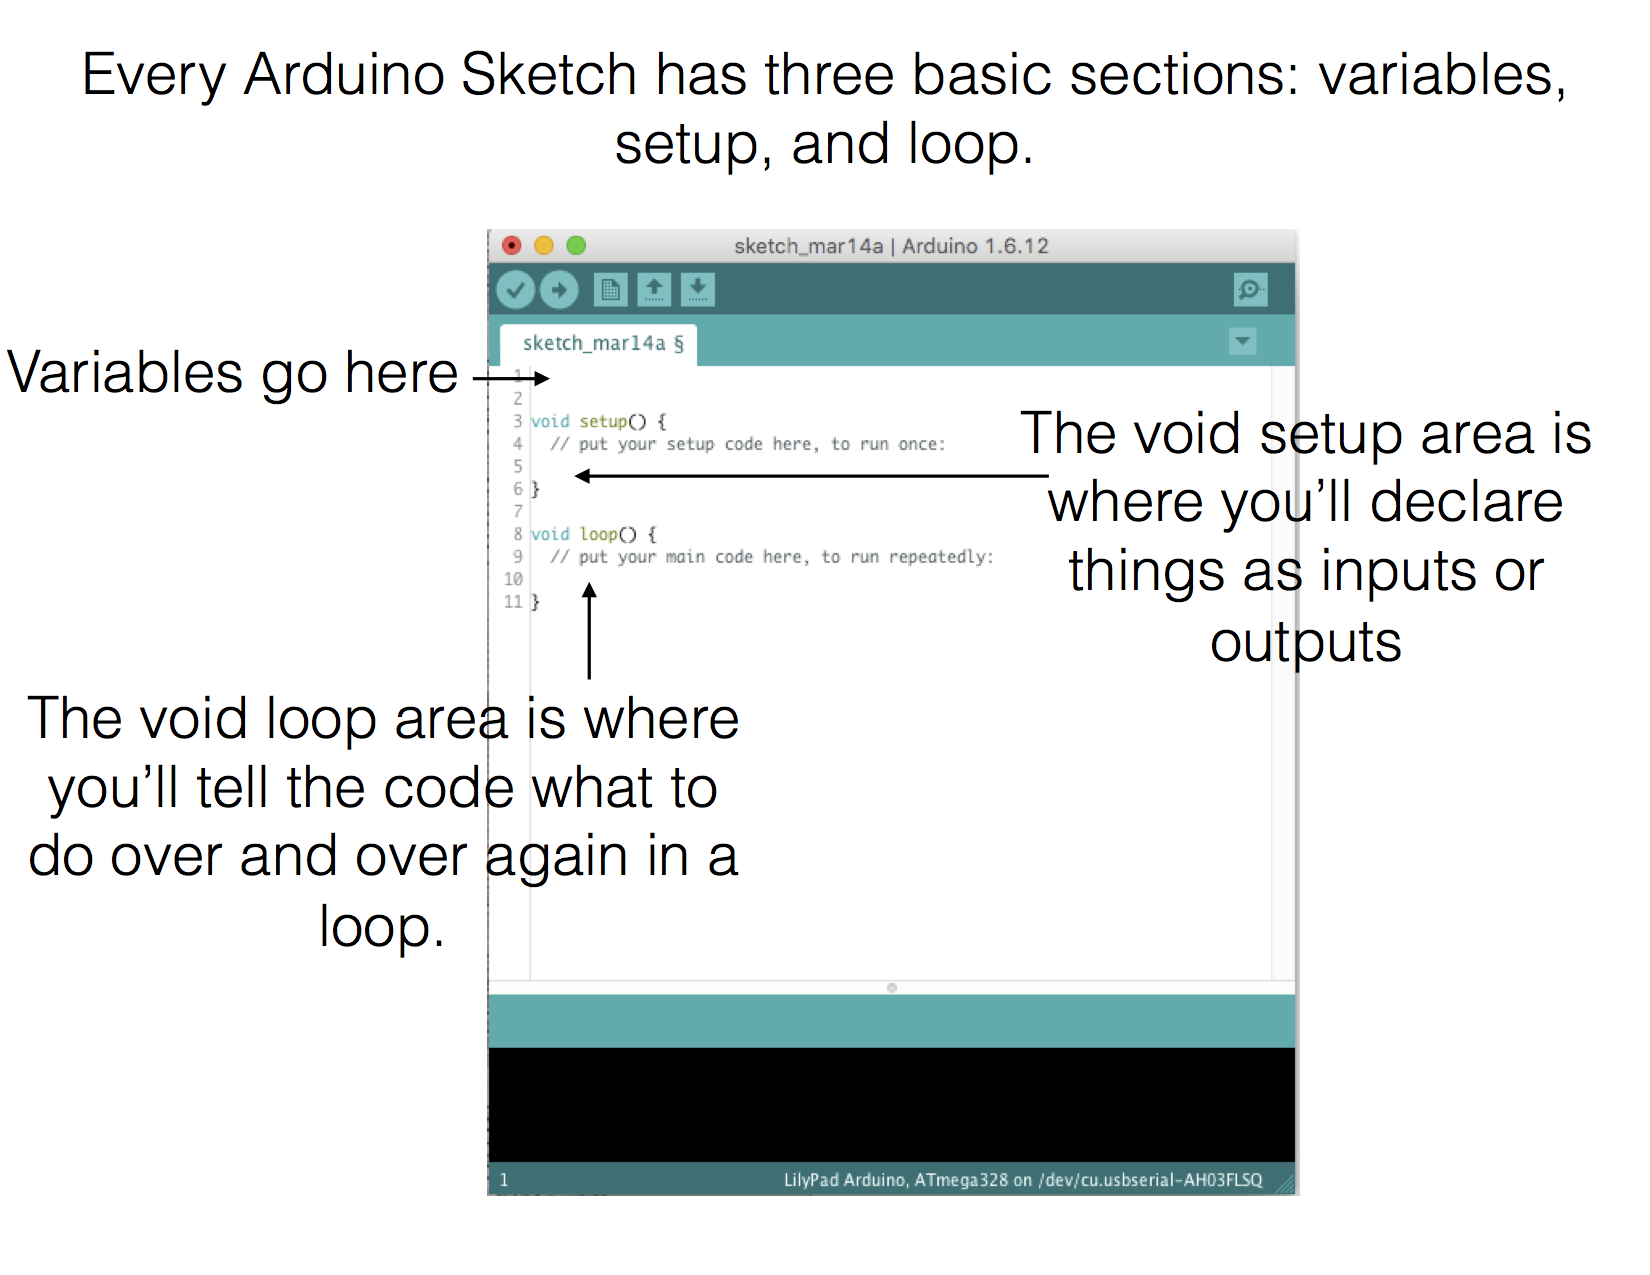
- Now, let’s examine our music_output sketch more closely to understand what it’s all about.
- NOTE: Return to the last XP if you do not have the music_output sketch loaded on your microcontroller
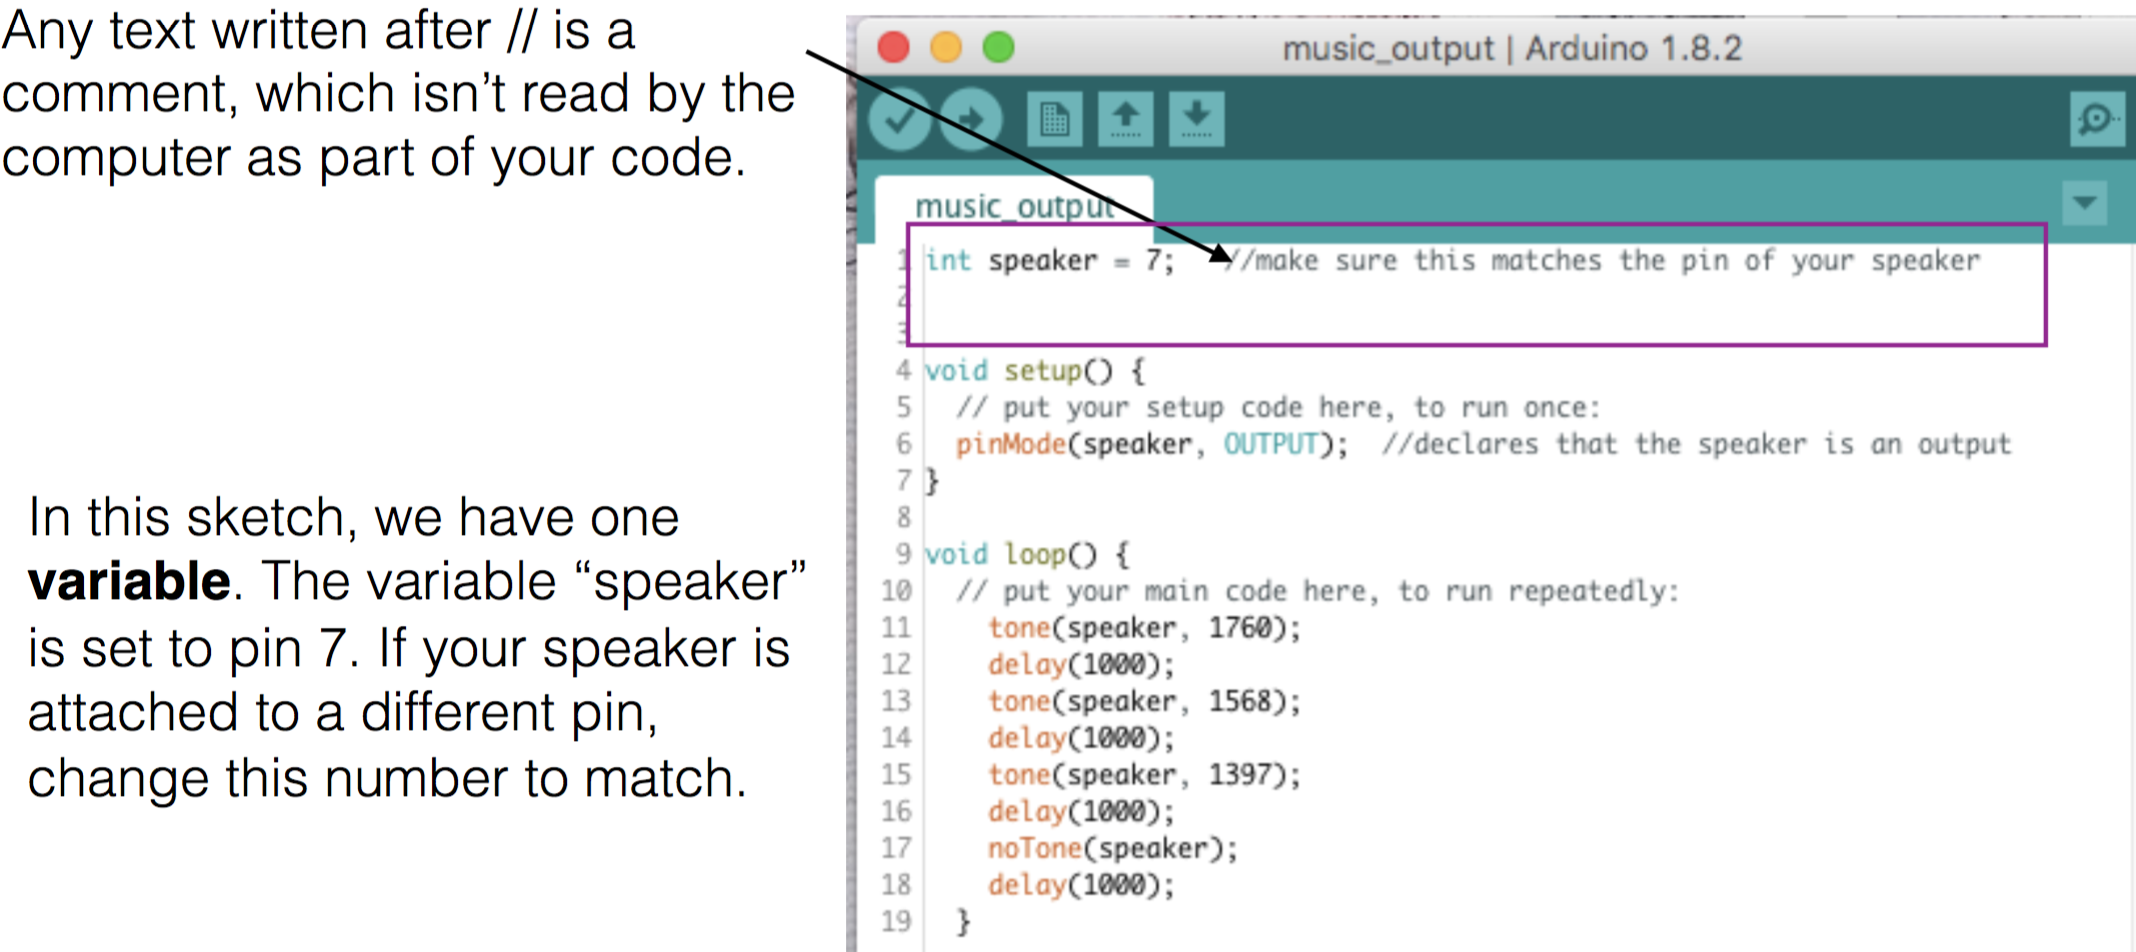
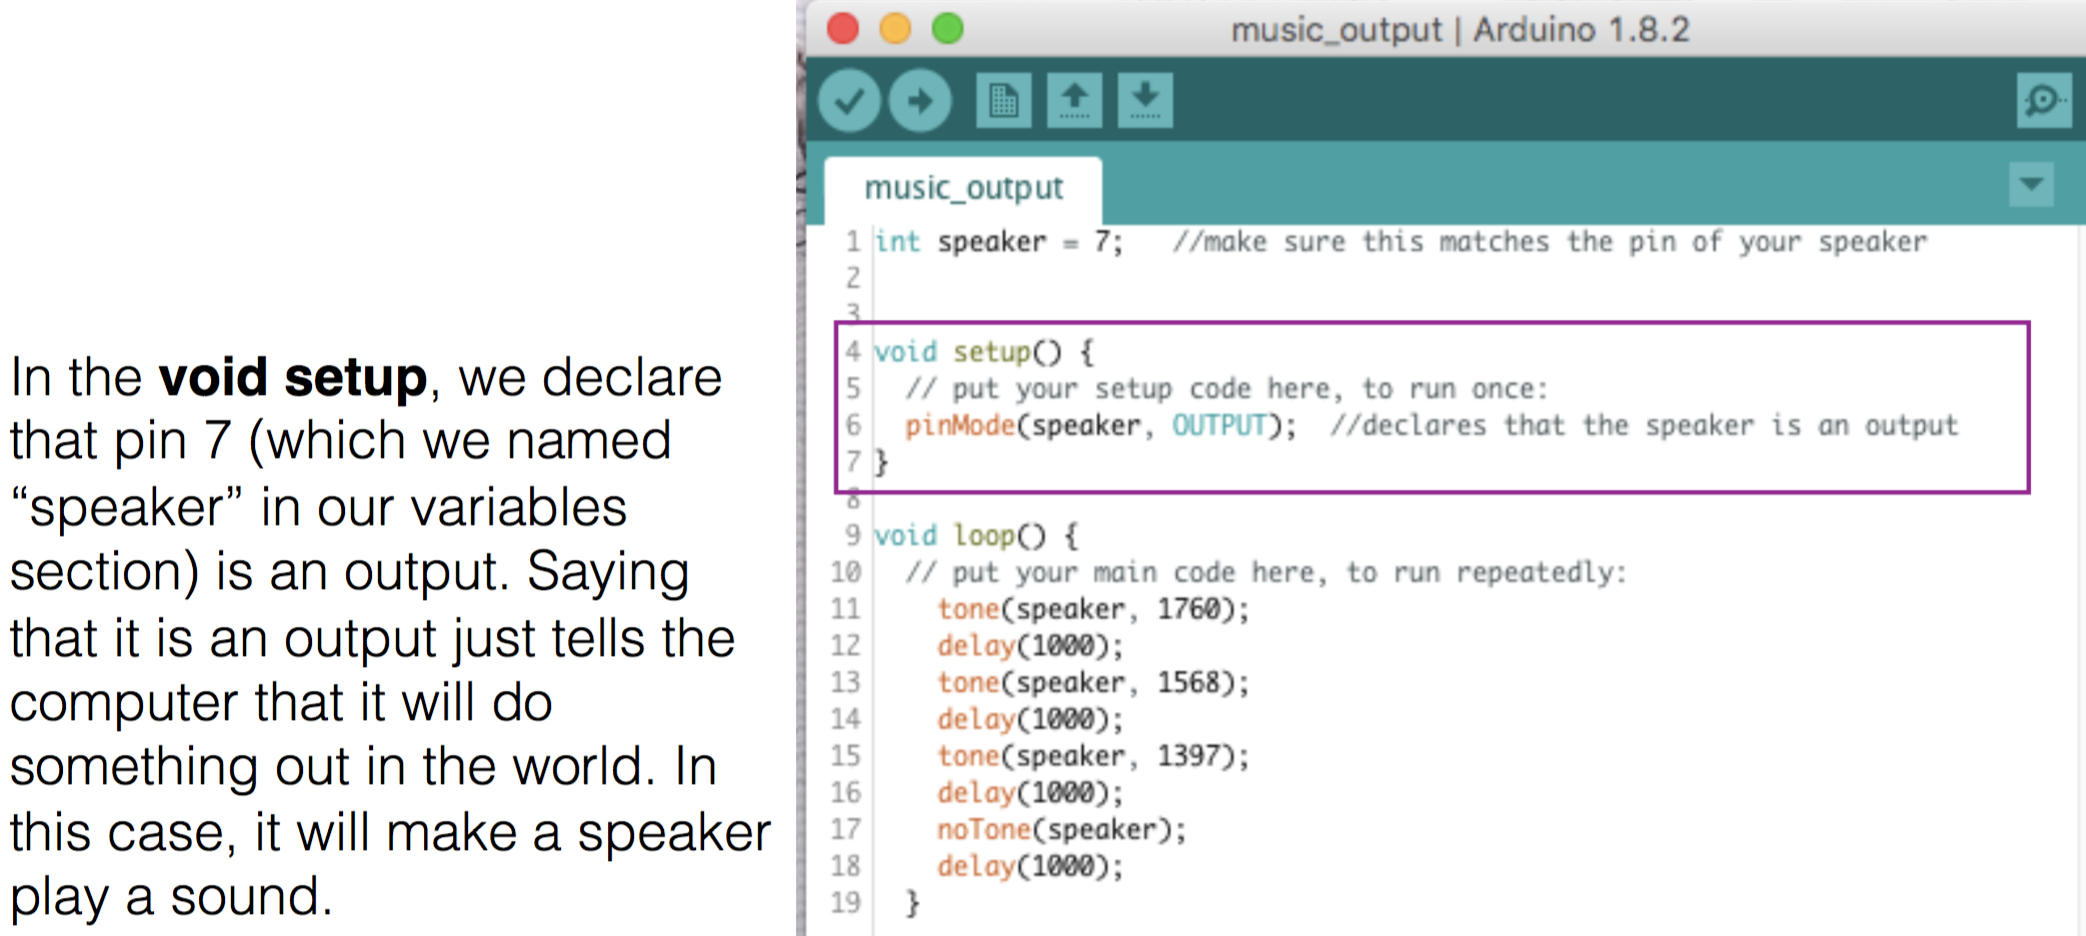
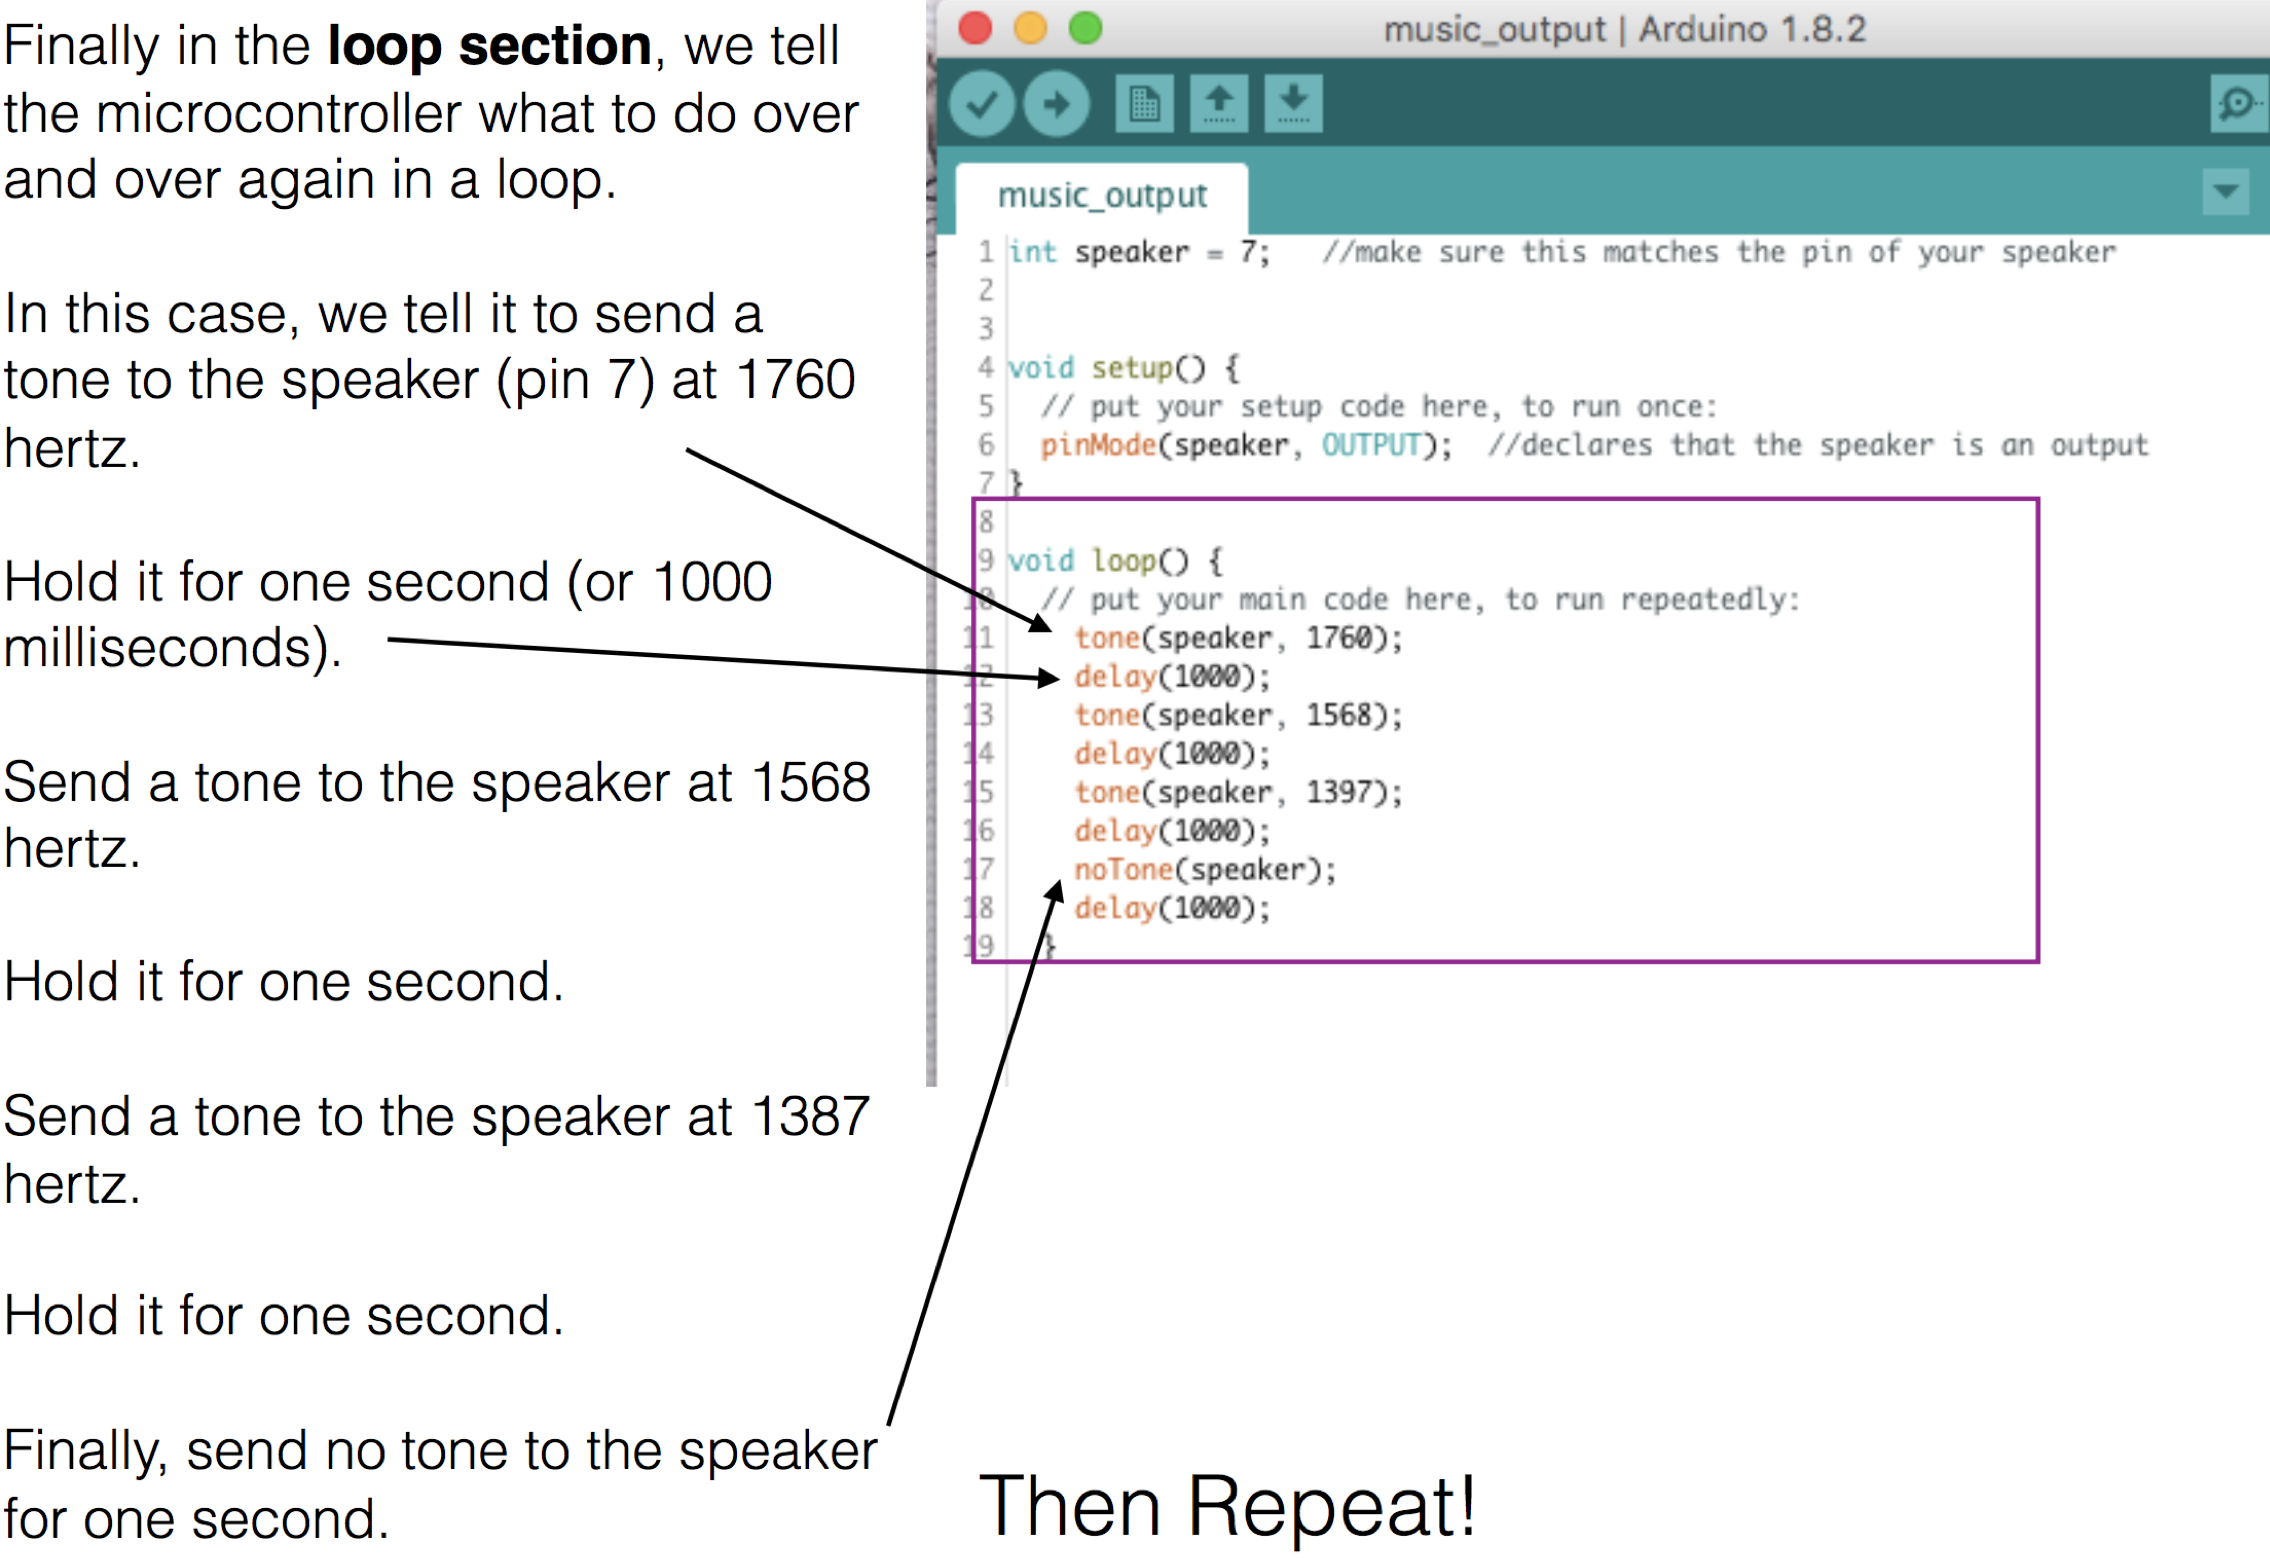
Step 2. Watch the following video that shows you how to play with code to make your own melodies in the Arduino IDE. Directions are below in text:
You can play with the code in the void loop section of the music_output sketch.
- Change the numbers after the word “speaker”.
- These numbers represent frequency in hertz.
- You don’t have to know what that means to try new numbers.
What happens if you type in a higher number?
What happens when you type in a lower number?
- Remember to upload your code to your microcontroller every time you make a change to the sketch.
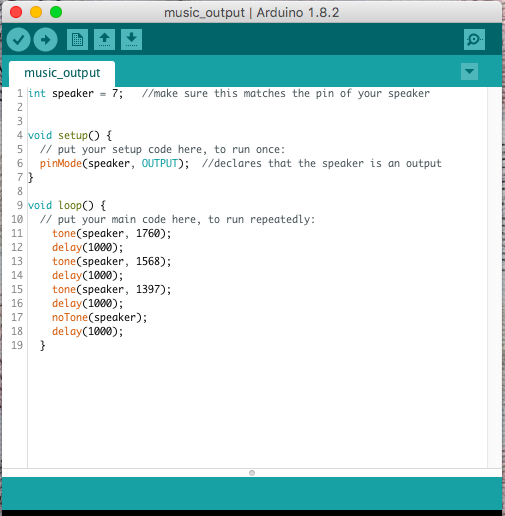
- You can also change the length of your delays.
- What happens when you type in a lower number?
- What happens when you type in a higher number?
- What if all of your delays are different lengths (different numbers)?
- How can you make your melody longer?
- Try adding a new line of code that says
tone(speaker, );
delay( );
Fill in the blanks with your own numbers.
Remember to upload your code to your microcontroller every time you make a change to the sketch.
If you get an error, try looking for:
- extra spaces in your code
- missing semicolons in your code
- missing brackets in your code
If none of that works – try downloading the sketch again and using that.
Share What you Learned
If you are using the LRNG platform:
- You do not need to submit anything for this XP
- You should be able to show someone your microcontroller playing the melody you created
- If you want, you can then learn even more with the optional “Go Further!” activities below
If you are not using the LRNG platform:
- Continue below and share with your teacher or organization:
Sharing What You Learned
Upload a recording or short video of your microcontroller playing the melody you coded and uploaded to the microcontroller.
Next Steps
Curious about learning more?
Go Further! (optional) Learn how to program melodies with note names (A, B, C, G etc.) in place of numbers.
OR
Move On
Return to the XP How can I create instruments and interfaces with microcontrollers? (continue to the next XP in the mini-playlist)

